 Examples
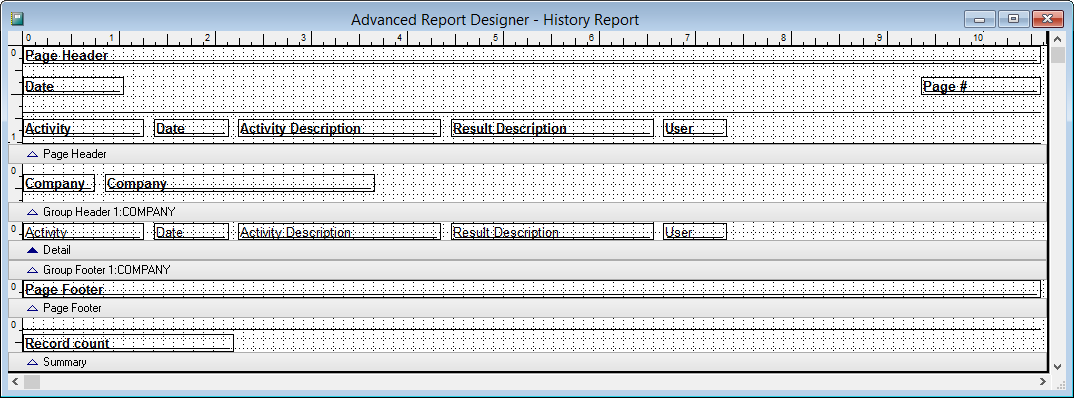
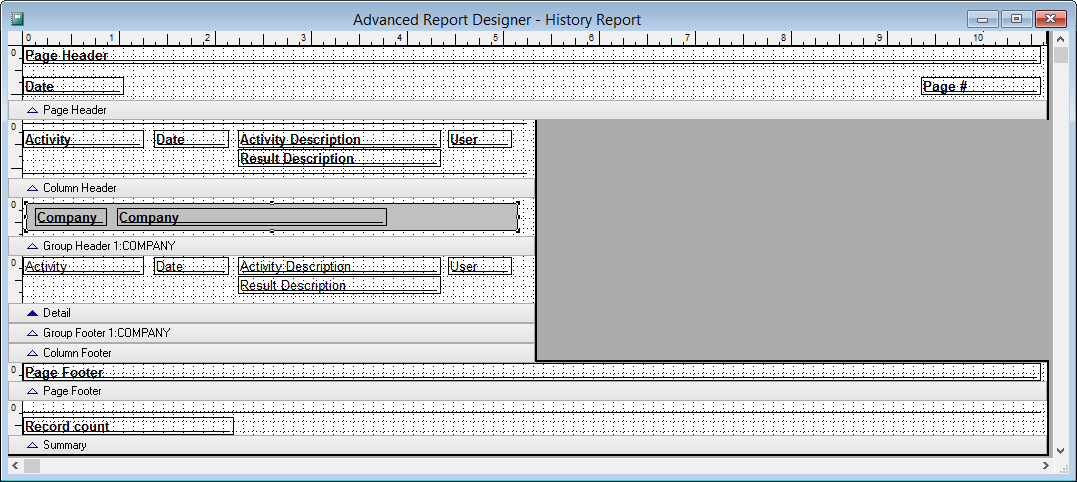
Let's create an advanced layout for the History report we created in Lesson 1 of the tutorial. We want to create a 2-column report so more information fits on each page. First, select this report in the Reports Explorer and choose Edit. Choose Step 5 from the step drop down list, set the Orientation to Landscape, turn on the Advanced Layout setting, and click the Edit button. You'll be prompted confirming that the report objects should be auto-fitted for width; choose Yes. The Advanced Report Designer should appear as shown below.
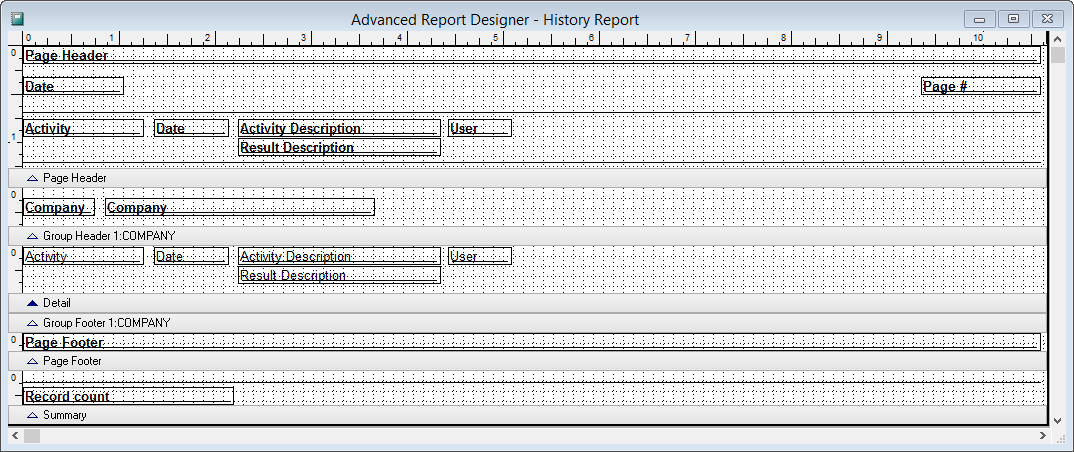
Let's start by moving the result description onto its own line below the activity description. Drag the detail band's bar down to make room, then select the field under the Result Description heading and drag it down below the activity description field. Move the detail band's bar until it's a little below the result description field. Drag the page header band's bar down to make room, then drag the lower line in the page header band down to make room. Click on the Result Description heading and drag it down below the Activity Description heading. Move both the User heading and field to the left so they're close to the other fields. Move the lower line and page header band's bar until they're a little below the Result Description heading. The report should now look like this:
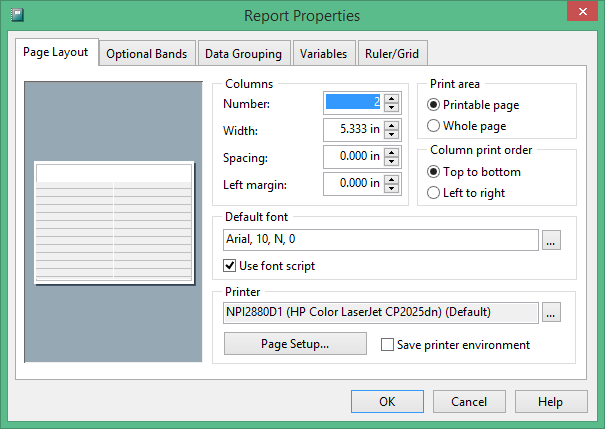
Next, choose Page Setup from the File menu. Change the number of columns to 2.
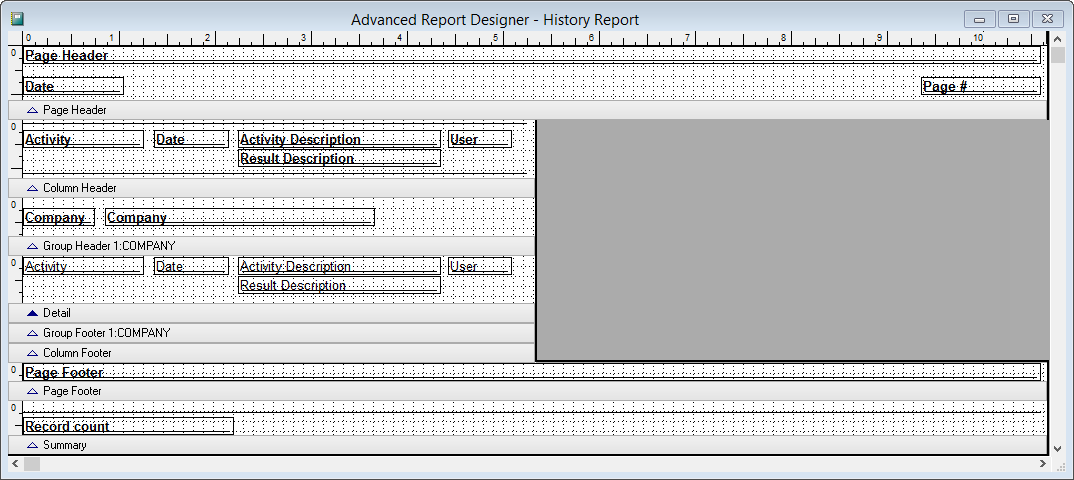
Drag the column header band's bar down to make room for the report's headings. In the page header, select one of the two horizontal lines, then grab and drag one of its endpoints to reduce its size. Do the same for the second horizontal line. To be sure these lines have the same width, you can select both, and then choose the Same Width button in the report layout toolbar. Select all the column heading objects in the page header band, and move them into the column header band instead. Adjust the sizes of the page header and column header bands to fit their contents. The report should now look like this:
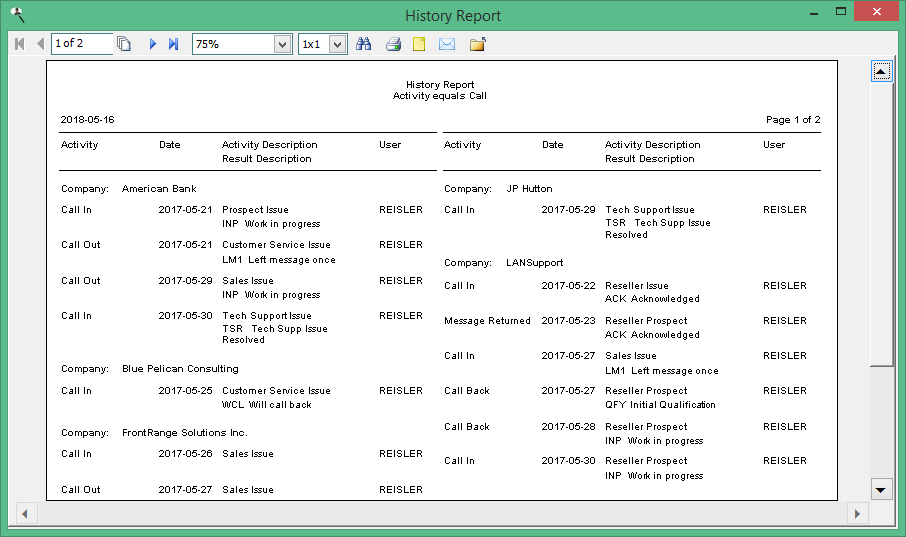
Choose Print Preview from the Report menu to preview the report; it should look like this:
Let's add a grey rectangle in the group header to make it stand out. To make room for the rectangle at the left, select all objects in the group header band by holding down the Shift key and double-clicking the grey bar for the band, then click one of them and drag slightly to the right. Now click the Rectangle object ( ) in the Report Controls toolbar, click near the upper left corner of the group header band and drag to the lower right corner to draw a rectangle. Click the Background button (
 ) in the Color Palette, then click the light grey button to make that the fill color for the rectangle. Oops, the rectangle now completely covers the labels and fields in the band. Click the Send to Back button (
 ) to move the rectangle behind the other objects. Here's the finished product:
© Stonefield Software Inc., 2025 • Updated: 08/29/18
Comment or report problem with topic