 Examples
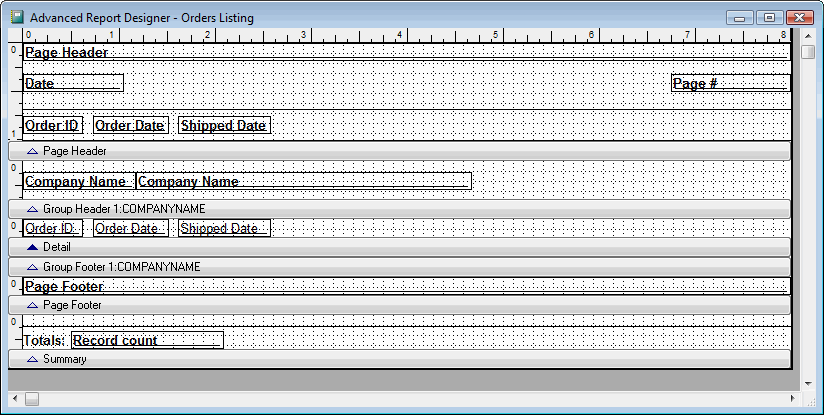
Let's create an advanced layout for the Open Batch Listing report we created in Lesson 1 of the tutorial so it has a two-column layout. First, select this report in the Reports Explorer and choose Edit. Click Next four times to go to Step 5 (or choose Step 5 from the Step option at the top of the dialog), then turn on the Advanced Layout setting and click on Edit. The Advanced Report Designer should appear as shown below.
Let's start by moving the Date and Reference fields into the group header band for Entry Number, since they don't change for each detail record. Click the Date field, then hold down the Shift key and click on the Reference field so both are selected. Dragging the two up into the Group Header 2 band, to the right of the Entry Number field.
Next let's move the other fields over to the left. Click the Description field, then hold down the Shift key and click the Account, Debit, and Credit fields in the detail band and the Debit and Credit fields in both Group Footer bands and the Summary band. Drag the fields to the left until Description is at the left edge of the page. The report should now look like this:
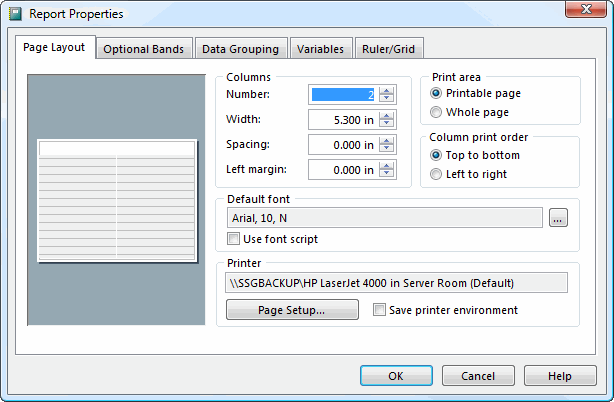
Now let's make it into a two-column layout. From the File menu, choose Page Setup. Change the number of columns to 2 and click OK. The report now looks like this:

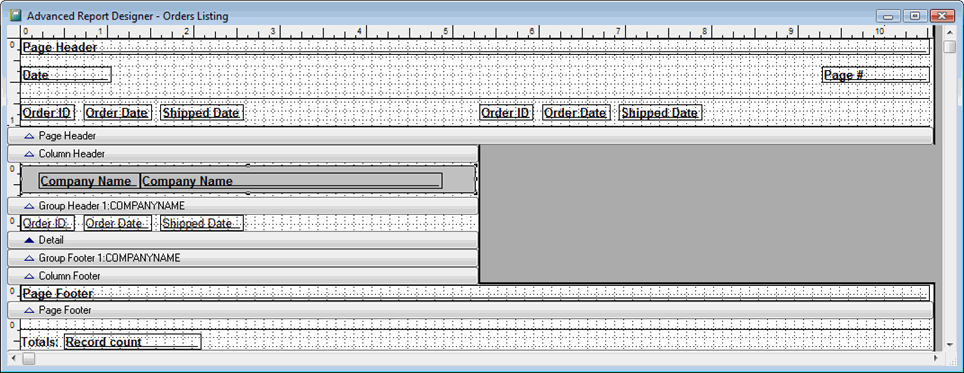
Notice that some fields extend into the dark grey area at the right, indicating that they're outside their column. We need to fix that, so start by reducing the size of the Reference field. Click that field, then move the mouse pointer to its right edge, click, and drag the field so its right edge is just inside the right edge of the column. If you use the Elegant template (like the example images show) or some other template that has objects in the Group Header bands, resize those so they fit as well. Next, size the Description, Debit, and Credit fields in the Detail band a little smaller and move them and the Account field so they all fit within the column.
Once you have them fitting, adjust the Debit and Credit fields in both Group Footer bands and the Summary band to align with those in the Detail band. The easiest way to do that is as follows: select all Debit fields, click the Align Left Sides button in the toolbar ( ), and hold down the Ctrl key and click the Same Width button in the toolbar (
 ) or choose Format, Size, To Narrowest from the menu. Do the same thing for the Credit fields.
The column headings that appear in the Page Header band aren't needed anymore, so select and delete them, then click the grey bar below the Page Header band and drag it up so the band isn't taller than necessary. The report now looks like this:
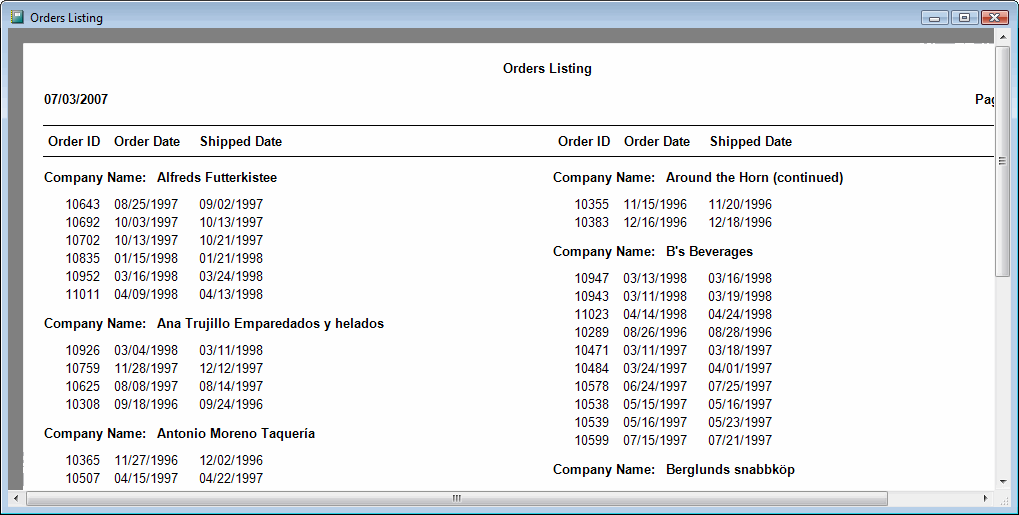
Let's see what the report looks like when we run it. Choose Print Preview from the Report menu. It should appear similar to the following:
© Stonefield Software Inc., 2025 • Updated: 08/29/18
Comment or report problem with topic