 Lesson 2: Running a Report
Let's run the Posted Transaction report you created in the previous tutorial. To do that, select it in the Reports Explorer, then click the Preview button. It should look just as it did when you created it. However, what if we don't want every item printed? Say we only want items entered on a certain day. Restricting which records appear is called filtering. The Filter Page of the Reports Explorer is used for filtering, so select that page. Click the Filter button to display the Filter dialog. Currently, there are no filter conditions so the list of conditions shown in this dialog is blank. Click the Add button to add a condition to the list. The Filter Condition dialog shown below appears.
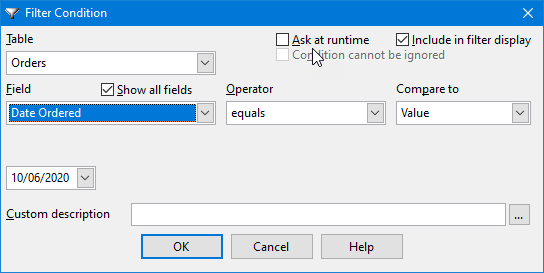
Since we want to filter on transaction date, select "GL Posted Transactions Header" from the Table list and "Transaction Date" from the Field list. If you only want entries for a single day, select "equals" from the Operator list. If you want all entries before or after a certain date, choose "is less than" or "is greater than". If you want all entries between a set of dates, choose "is between". After selecting the operator, enter the desired date (or dates if you selected "is between"), then click the OK button. The Filter Condition dialog closes and your condition appears in the Filter dialog. Although you can add other conditions, let's just click the OK button in the Filter dialog for now.
Now click the Preview button in the Reports Explorer. If there are any entries that match your conditions, the report displays only those entries. If there aren't any entries (for example, if you chose "Transaction Date is greater than 01/01/2100" and there aren't any entries after that date), a message displays telling you that.
© Stonefield Software Inc., 2025 • Updated: 01/20/21
Comment or report problem with topic