 Output Options
There are several possible output destinations for a report: printer, spreadsheet, file, email, etc. You can also preview a report on the screen.
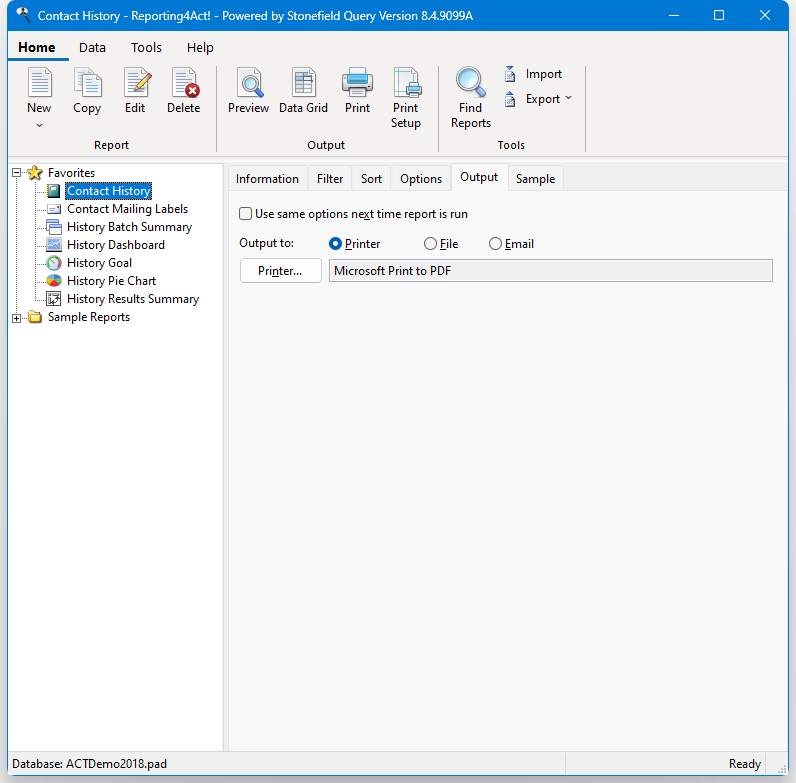
The Output to setting on the Output page of the Reports Explorer determines what happens when you click the Print button in the toolbar or in the Home tab of the ribbon; the default output destination is Printer. To output to a file, select File; in this case, the Print button appears as Process instead of Print. To email a report, choose Email; in this case, the Print button appears as Send instead of Print. The Preview button always sends the report to the screen, regardless of how the Output to option is set.
If you turn on Use same options next time report is run, all options specified in this page are used as the defaults the next time the report is selected.
Printing a Report
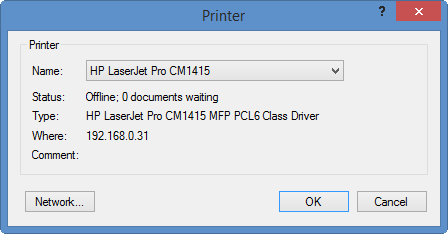
Reporting4Act! normally prints to your default Windows printer. To select a different printer, click the Printer button to bring up the Printer dialog. You can also choose Print Setup from the File menu or the Home tab of the ribbon. The box beside the button shows the current printer.
Outputting a Report to a File
To output a report to a file, select File in the Output to option.
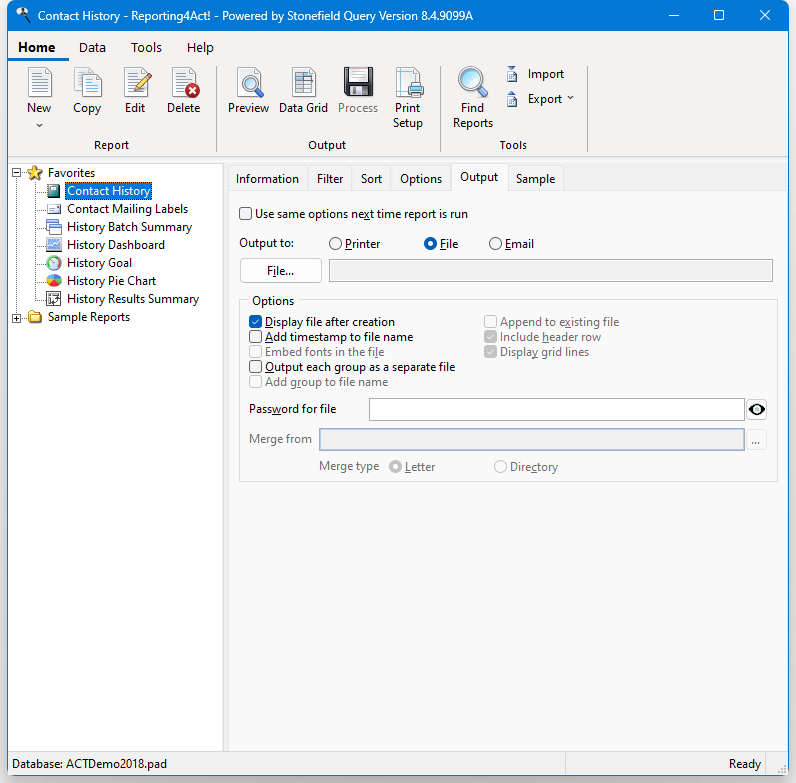
The file to create defaults to the type of file you output to last time in the folder you used last time with the name of the report as the file name. You can, of course, change this by clicking the File button, which allows you to select which type of file to create, as well as the file name and location. Clicking this button brings up the Output to File dialog.
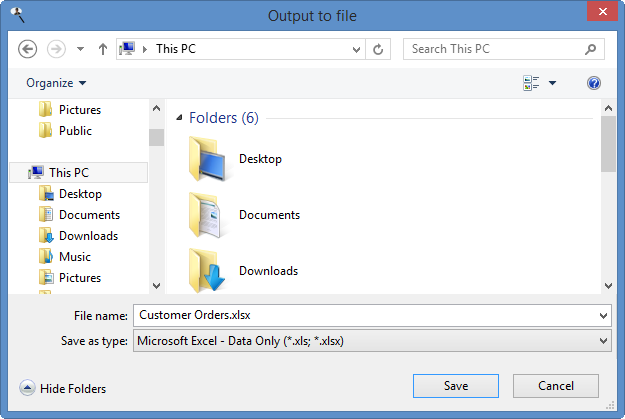
Select the type of file to output to from the Save as type drop-down list. Some choices that output to Microsoft Word or Microsoft Excel are not available for scheduled reports because they run Word or Excel during the processing and those applications don't work correctly when run from a scheduled task. Also, some choices are not available for some types of reports. The output choices are:
Delimited: this outputs the fields that appear in the report to a delimited (also known as comma-separated values or CSV) text file. Each field in the file only takes up as much space as needed, and a comma is used to separate fields. Records are terminated with a carriage return. The default extension for a delimited file is CSV. This output type is not available for gauge reports.
Delimited - Microsoft Excel format: this is very similar to Delimited but uses Excel formatting so things like leading zeros are preserved when the file is opened in Excel. This output type is not available for gauge reports.
Image - BMP: this outputs the report to a bitmap image file. Note that since an image can contain only one page, the file name you specify is used as the "base" name. Each report page is output to a different file with the base name and the page number as a suffix. For example, if you specify "Customers.BMP" as the file name, the first page of the report is output to "Customer0001.BMP," the second to "Customer0002.BMP," and so forth. The default extension is BMP. Also note that outputting a chart or gauge to an image outputs only the chart or gauge itself, not the entire page and template.
Image - GIF: this outputs the report to a GIF image file. As with BMP output, each report page is output to a different file with the base name and the page number as a suffix, and outputting a chart or gauge to an image outputs only the chart or gauge itself. The default extension is GIF.
Image - JPEG: this outputs the report to a JPEG image file. As with BMP output, each report page is output to a different file with the base name and the page number as a suffix, and outputting a chart or gauge to an image outputs only the chart or gauge itself. The default extension is JPG.
Image - PNG: this outputs the report to a PNG image file. As with BMP output, each report page is output to a different file with the base name and the page number as a suffix, and outputting a chart or gauge to an image outputs only the chart or gauge itself. The default extension is PNG.
Image - TIFF: this outputs the report to a TIFF image file. Unlike other image formats, all report pages are output to a single, multi-page TIFF file. The default extension is TIFF. Note that outputting a chart or gauge to an image outputs only the chart or gauge itself, not the entire page and template.
Microsoft Excel - Data Format: this outputs the fields that appear in the report to a Microsoft Excel spreadsheet with minimal formatting. This is the preferred Excel format because it's easier to work with than Microsoft Excel - Full Format. Note that for a report with subreports, only the data for the main report is output. The default extension for an Excel file is XLSX. This output type is not available for gauge reports.
This format was formerly called Microsoft Excel - Data Only (Fast).
Microsoft Excel - Full Format: this outputs to a Microsoft Excel 2007 or later spreadsheet but reproduces the layout of the report as closely as possible, including formatting and calculated fields. The default extension for an Excel file is XLSX. Excel does not have to be installed on the machine to use this format.
Microsoft Excel 97-2003 - Full Format: this outputs to a Microsoft Excel 2003 or earlier spreadsheet but reproduces the layout of the report as closely as possible, including formatting and calculated fields. The default extension for an Excel file is XLS. This format requires that Excel be installed on the system and cannot be used for scheduled reports.
Microsoft Excel - Chart: the Microsoft Excel - Full Format format outputs a chart report to an Excel spreadsheet containing a image of the chart. To output to a true Excel chart, use Microsoft Excel - Chart instead. The default extension for an Excel file is XLSX. This output type is only available for chart reports. This format requires that Excel be installed on the system and cannot be used for scheduled reports.
Microsoft Excel - PivotTable: this outputs a cross-tab report to a Microsoft Excel 2000 or later PivotTable. The default extension for an Excel file is XLS, but it will automatically change the file extension to XLSX if Excel 2007 or later is installed on your system because Excel requires that. This output type is only available for cross-tab reports. This format requires that Excel be installed on the system and cannot be used for scheduled reports.
Microsoft Word: this outputs the report to a Microsoft Word 2007 or later document with the same layout as the report. Word does not have to be installed on the machine to use this format. The default extension for a Word file is DOCX.
Microsoft Word 97-2003: this outputs the report to a Microsoft Word 2003 or earlier document with the same layout as the report. The default extension for this type of Word file is DOC. This format requires that Word be installed on the system and cannot be used for scheduled reports.
Microsoft Word Mail Merge: this performs a mail merge using Microsoft Word. There are two choices for output: to a DOCX or DOC file or to a PDF file. This format requires that Word be installed on the system and cannot be used for scheduled reports. This output type is only available for quick reports.
OpenOffice Calc: this outputs the report to an OpenOffice Calc spreadsheet. The default extension is ODS.
OpenOffice Writer: this outputs the report to an OpenOffice Writer document. The default extension is ODT.
PDF: select this to output to a Portable Document Format (PDF) file. This type of file can be opened in Adobe Acrobat Reader or other PDF reader applications. The default extension for a PDF file is PDF.
Rich Text Format: this outputs to a Rich Text Format (RTF) file. This type of file can be opened in many types of word processors. The default extension for an RTF file is RTF.
Table: this outputs the fields that appear in the report to a DBF file. Note that for a report with subreports, only the data for the main report is output. The default extension for a table is DBF. This output type is not available for cross-tab or gauge reports.
Text: this outputs the fields that appear in the report to a text file. The text file is formatted as fixed-length fields, meaning that each field takes up a fixed amount of space and there are no separators between fields. Records are terminated with a carriage return. The default extension for a text file is TXT. This output type is not available for cross-tab or gauge reports.
Web Page: this outputs the report to a Web page (HTML) file with the same layout as the report. The default extension for a Web page file is HTML.
XML: this outputs the fields that appear in the report to an XML (eXtendible Markup Language) document. Note that for a report with subreports, only the data for the main report is output. The default extension for an XML file is XML. This output type is not available for cross-tab or gauge reports.
XPS: this outputs the report to an XML Paper Specification file. The default extension is XPS.
After selecting the file type, enter a name for the file. You can also specify a location for this file using standard File dialog operations. Once you have specified a name and location, click the Save button to accept the file type, name, and location or Cancel to cancel the changes. If the file you selected already exists, you are asked if you want to overwrite it. If you choose Save, the name and location of the file appears beside the File button in the Reports Explorer.
Hovering your mouse over the file name shows the type of output as a tooltip. This is helpful because, for example, several output types use XLSX as a file extension.
To actually create the file, click the Process button in the toolbar.
If you have not activated Reporting4Act!, certain output types will only output 20 or less records. These output types are Delimited, Microsoft Excel - Data Format, Spreadsheet, Table, Text, and XML.
The output options available are:
Display file after creation: If this option is turned on, the file is displayed in its usual editor after it's created. For example, if you output to an Excel document, the document is automatically opened in Excel.
Add timestamp to file name: Turn this option on to add a timestamp to the file name, using the format "YYYYMMDDHHMMSS." For example, if the file name you choose is "My Report.PDF" and you run the report at 1:17 p.m. on March 25, 2009, the actual name of the file is "My Report 20090325131737.PDF." This is useful if you output the report several times and don't want each run to overwrite the same file.
Embed fonts in the file: Turn this option on if you want the fonts used in the report to be embedded in the file; this option is only available for PDF files. Turning this on significantly increases the size of the file but is useful if the report uses fonts, such as a barcode font, which may not exist on another computer you want to view the PDF on.
Output each group as a separate file: If you turn this option on, each group in the report is output as a separate file. For example, if you have a report showing customers grouped by country, turning this option on results in separate files with only customers from Argentina in one, only customers from Austria in another, and so on. This is useful if, for example, you want to create an invoice for each customer without having to run an invoice report multiple times, each with a filter on a different customer name. This option is only available for quick reports if there's at least one grouped field in the report, for cross-tab reports if there's a page field, and for chart reports if there's a series field and you're not outputting to an image.
Add group to file name: This option, which is only available when Output each group as a separate file is turned on, determines whether the value of each group is added to the file name. For example, if you have a report showing customers grouped by country and specify "Customers.PDF" as the file name, turning this option on results in files named "Customers Argentina.PDF" (including only customers from Argentina), "Customers Austria.PDF" (including only customers from Austria), and so on.
Append to existing file: Turn this option, which is only available when you've selected a PDF, Excel Full Format, Excel Data Format, CSV, or text file for output, on if you want to add the report to an existing file. This is handy if you want to output several reports to a single PDF file, to separate worksheets in a single Excel file, or to combine different reports into a CSV file; specify the same file name for each report, and turn this option on for the second and subsequent reports.
Include header row: If this option, which is only available when you've selected Microsoft Excel - Data Format, comma-separated, or text file for output, is turned on (the default), the first row of the output includes column headings. Turn this option off if you don't want that row in the file.
Display grid lines: Set this option, which is only available when outputting to an Excel document, to indicate whether the document displays grid lines or not.
Include totals: Set this option, which is only available when outputting to an Excel data format document, to indicate whether the document includes totals or not.
Password for file: Fill this in if you want to password protect the file. In the case of a PDF file, the file itself is encrypted; other file types are added to an encrypted ZIP file using the same name as the output file but with a "zip" extension. Click the "show password" button toggle between displaying the password in plain text or as "*****" (the password is always stored encrypted regardless of the setting of this button).
Merge from: This setting, which is only available when you've selected Microsoft Word Mail Merge for output, is the name of the Word document to do the mail merge from.
Merge type: This setting, which is only available when you've selected Microsoft Word Mail Merge for output, determines whether Word uses "letter" or "directory" as the type of merge to perform. It mainly determines whether a page break occurs after each record ("letter") or not ("directory").
Emailing a Report
To email a report, select Email in the Output to option.
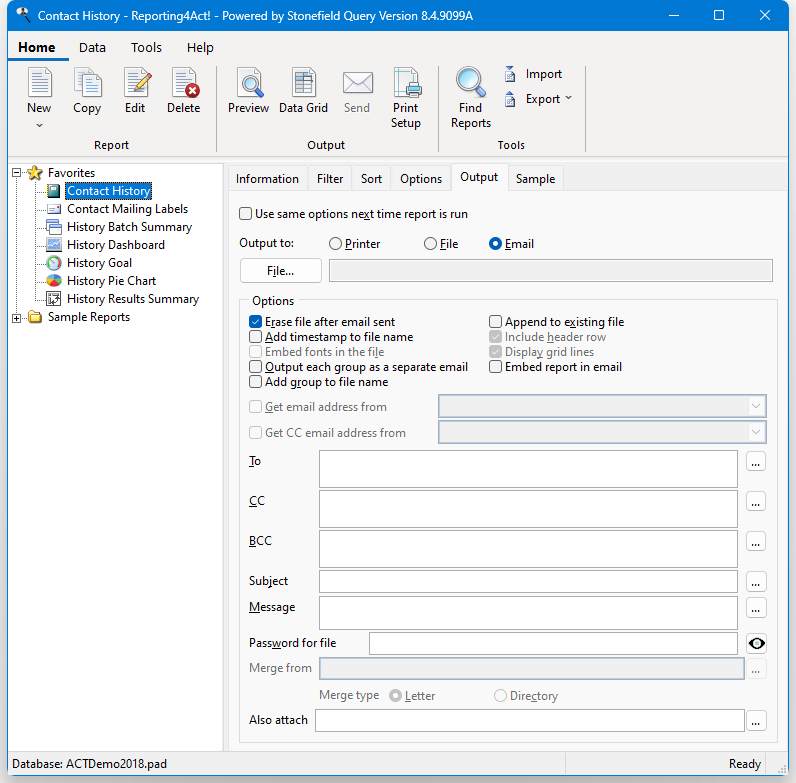
The options available are:
- File: This button allows you to select which type of file to output, as well as the file name and location. You have the same set of options as described above for this button. If you do not specify a file name or file type, Reporting4Act! will create a PDF file with the same name as the report.
Hovering your mouse over the file name shows the type of output as a tooltip. This is helpful because, for example, several output types use XLSX as a file extension.
Erase file after email sent: Turn this option off if you don't want the file erased after the email is sent.
Add timestamp to file name: Turn this option on to add a timestamp to the file name, using the format "YYYYMMDDHHMMSS." For example, if the file name you choose is "My Report.PDF" and you run the report at 1:17 p.m. on March 25, 2009, the actual name of the file is "My Report 20090325131737.PDF." This is useful if you output the report several times and don't want each run to overwrite the same file.
Embed fonts in the file: Turn this option on if you want the fonts used in the report to be embedded in the file; this option is only available for PDF files. Turning this on significantly increases the size of the file but is useful if the report uses fonts, such as a barcode font, which may not exist on another computer you want to view the PDF on.
Output each group as a separate email: If you turn this option on, each group in the report is output as a separate file, with the file name being the name you chose or the name followed by the group value if Add group to file name is turned on. This is useful if, for example, you want to create an invoice for each customer without having to run an invoice report multiple times, each with a filter on a different customer name. This option is only available for quick reports if there's at least one grouped field in the report, for cross-tab reports if there's a page field, and for chart reports if there's a series field and you're not outputting to an image.
Add group to file name: Turn this option on, which it is by default, if Output each group as a separate email is turned on and you want to group value added to the file name. For example, if you have a report showing customers grouped by country and specify "Customers.PDF" as the file name, turning this option on results in files named "Customers Argentina.PDF" (including only customers from Argentina), "Customers Austria.PDF" (including only customers from Austria), and so on. If this option is turned off, all files emailed have the same name. If Erase file after email sent is turned off, this option is automatically turned on and can't be changed, since otherwise the files would all overwrite each other.
Append to existing file: Turn this option, which is only available when you've selected a PDF, Excel, CSV, or text file for output, on if you want to add the report to an existing file. This is handy if you want to output several reports to a single PDF file, to separate worksheets in a single Excel file, or to combine different reports into a CSV file; specify the same file name for each report, and turn this option on for the second and subsequent reports.
Include header row: If this option, which is only available when you've selected Microsoft Excel - Data Format, comma-separated, or text file for output, is turned on (the default), the first row of the output includes column headings. Turn this option off if you don't want that row in the file.
Display grid lines: Turn this option, which is only available when outputting to an Excel document, on to indicate whether the document displays grid lines or not.
Embed report in email: Turn this option on to include the report as HTML in the body of the email. Doing so disables several other options, such as Erase file after email sent, that are not applicable,
Get email address from: This option, which is only available if Output each group as a separate file is turned on, uses a field from the report as the email address to send the group's file to. To follow the example from the previous item, suppose you wanted to email an invoice to each customer. Make sure the report includes the field containing the customer's email address, even if the Display this field in the report setting is turned off for that field, then turn on Get email address from and select the field containing the email address from the drop-down list beside this option. This will create one file for each group and email that file to the address indicated in the field you select.
Get CC email address from: This option, which is only available if Output each group as a separate file is turned on, uses a field from the report as the CC email address to send the group's file to.
To: To specify the recipients, either type their email addresses in the To text box or click the button beside that box and select the desired email addresses from the dialog that appears. The addresses in this dialog come from the recipients of reports you have previously emailed or by importing email addresses from an email program such as Microsoft Outlook. If you're using Microsoft Outlook or some other MAPI email program, you can enter the name of a distribution list to send the email to a group of people (how email is sent is configured in the Options dialog).
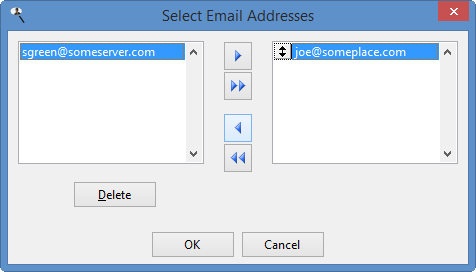
CC: This contains the email addresses of "carbon copy" or CC recipients. This works the same as To: either type the email addresses (or distribution list) or click the button to display the Select Email Addresses dialog.
BCC: This contains the email addresses of "blind carbon copy" or BCC recipients. This works the same as To: either type the email addresses (or distribution list) or click the button to display the Select Email Addresses dialog.
Subject: Type the subject for the email. A feature called auto-completion is available for the subject. This means that as you type, a drop-down list of previously entered values appears, from which you can select an item rather than typing the entire item again. This is similar to the way the address bar works in some Web browsers, for example. To select a previously used item, press the Down Arrow key until the desired item is highlighted and press Enter. You can also select it with the mouse. To remove a previously used item from the list, select it with the Down Arrow key or mouse and press the Delete key.
If you want to use an expression rather than fixed text for the subject, such as a user-defined function, add "{" and "}" (without the quotes) around field or function names in the text. You can also click the Expression Builder button (the button labeled "..." beside the text box) to display the Expression Builder, which is a much easier way to create the expression to use.
Here's an example of an expression that displays "Sales for spelled out month year" (such as "Sales for December 2001") in the subject:
Sales for {cmonth(date())} {year(date())}Expressions can even include fields from the result set for the report.
Message: This is the message body for the email. Like Subject, you can use expressions in the message; click the Expression Builder button to display the Expression Builder, which is a much easier way to create the expression to use. You can also use HTML tags to format the message. For example, the following text in Message:
This is <font color="red"><b>bold and red</b></font> textdisplays like this in the email body:
This is bold and red text
Password for file: Fill this in if you want to password protect the file. In the case of a PDF file, the file itself is encrypted; other file types are added to an encrypted ZIP file which is used as the attachment instead of the file. The ZIP file uses the same name as the output file but with a "zip" extension. Click the "show password" button toggle between displaying the password in plain text or as "*****" (the password is always stored encrypted regardless of the setting of this button).
Merge from: This setting, which is only available when you've selected Microsoft Word Mail Merge for output, is the name of the Word document to do the mail merge from.
Merge type: This setting, which is only available when you've selected Microsoft Word Mail Merge for output, determines whether Word uses "letter" or "directory" as the type of merge to perform. It mainly determines whether a page break occurs after each record ("letter") or not ("directory").
Also attach: This setting allows you to specify additional files to attach to the email in addition to the file for the report.
Once you have chosen the desired options, click the Send button. If you did not previously fill in the information in the Email page of the Options dialog, the email cannot be sent. In that case, you are asked if you want to fill that information in now. If so, that page of the Options dialog appears so you can do so and then click the Send button again to send the email.
© Keystroke.ca, 2025 • Updated: 05/29/25
Comment or report problem with topic